|
Equipment · BE455789
|
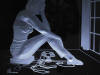
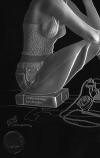
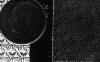
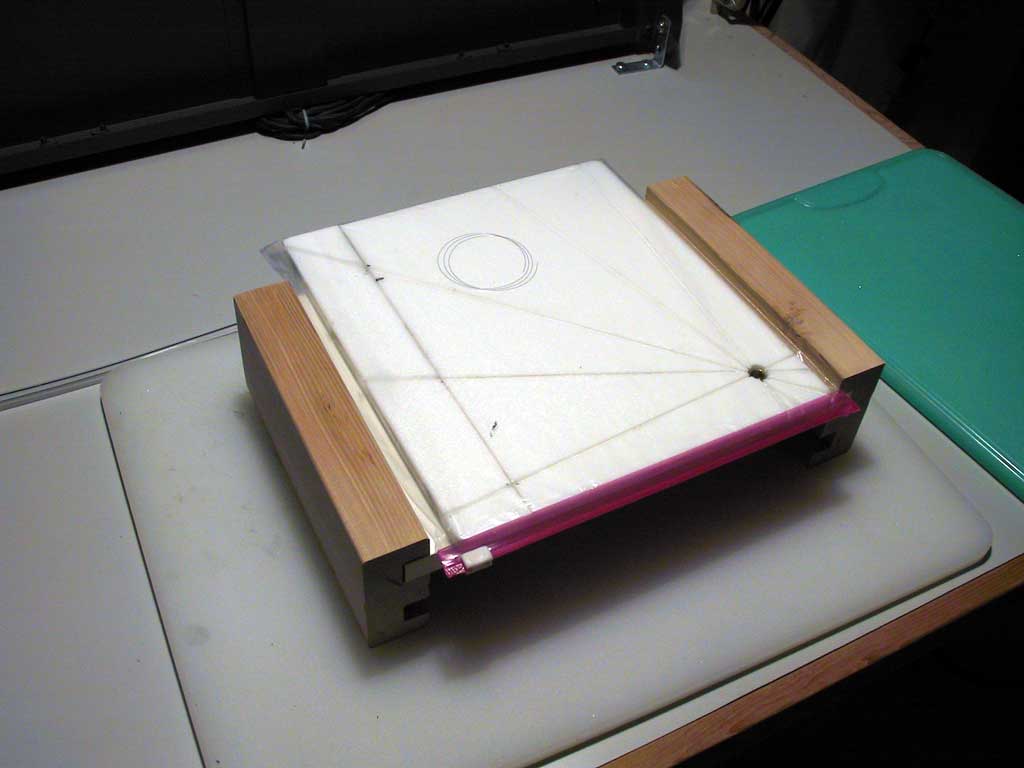
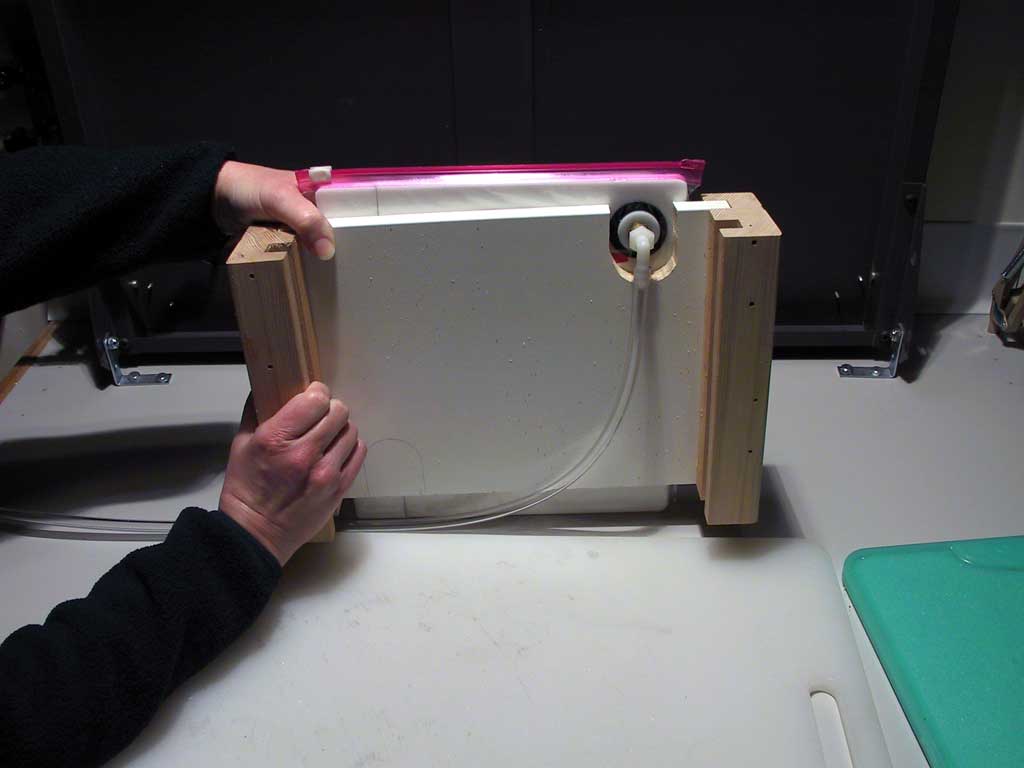
Texture, Pattern, Shade and ShadowIn my experience, learning to sandcarve involved four distinct steps: 1. Equipment selection 2. Process development 3. Technique development 4. Art skills and vision. It would be silly of me to state I'd mastered any of these. However at this point, the equipment is running, and the processes are producing images and resist of adequate quality. So, starting in December 2002, I've focused on adding pattern, texture, shade and shadow to the "tool box". Being by nature a photographer, I've been frustrated with the limitations of the glass medium. I'm satisfied with some of the pieces I've done, but when I return to my roots of Black and White fine prints, I long for the patterns, textures, shade and shadow I can manipulate to produce images of three dimensional scenes. I've had some satisfaction with using edge lighting to accentuate depth, but that approach forces the light source from the side of the image. It follows, then, that the next direction will be to add these tools to the glass carving toolbox. Texture and pattern (both vector and raster based images) are used by many glass carvers to add interest to their work. It's one of those either/or things. You can carve deep, or you can use texture, but you can't do both. Or can you? If you could apply a flexible photoresist AFTER a piece was deep carved, you might be able to put fine texture on top of deep carving. This requires "sealing" the glass with industrial strength hair spray, so that the resist will attach over the blasted surface, and forming this "second resist" into the contours of the glass. Will it stretch? Can it be registered accurately, so that the patterns match? What tools do you need? The answers are: yes, yes, and vacuum former, in that order. Wow! A vacuum former! Sounds expensive and complicated. Not so. If you have a vacuum frame, you've got a vacuum source. And a Ziploc bag makes a great seal. Total cost: about $4. First Attempt You can also make your own textures with a photo of fabric and good cross lighting. I selected the texture in PhotoShop, then used the pattern stamp tool to create a "blob" of pattern, without any repeats. I changed the pattern to pure black and white, first adjusting the brightness to create a pleasing balance. I then embedded the pattern blob in Illustrator, and used "envelope distort" then "make with mesh" to give the flat art the apparent 3D shape of her body. Then used a simple clipping mask to cut the blob to the outline of the sweater. I exposed the resist, placed it loosely on glass, then vacuum formed it to the glass. I blasted this piece fairly deep, considering the size of the texture elements. It took some doing to figure all this out; doing it again is really pretty straightforward; all the computer work above takes about 15 minutes. You can do all this with the 150 or so vector patterns in Illustrator, to put patterned, contoured clothing on a figure, then blast it on a deeply carved figure. The result looks terrific - I'll post more images as they are completed. Notice the seam on her jeans, too. The top stitching is 1/4 point dashed line, on top of deep carving. Second Attempt Starting in January 2003, I began a frustrating series of carvings, pushing my abilities in deep carving, textures, and second resists. The photo below - BE4-5789 - (if you don't understand the title, either you aren't old enough, or you don't like ancient rock 'n roll) is a first attempt at applying several texture maps with second resists. Lots of work remaining here: the right breast is incorrectly carved, and will be blended into the side of the chest for the final version; the seam line in the jeans was done correctly at the hip, but doesn't flow up and over the folds in the thigh as it should. The hair (not shown) needs reblasting. The phone number on the telephone (1 point type) is probably a lost cause; it's just too small. Note that the bright white lines on the folds are NOT the result of deep carving the outline; instead, they are the result of bright side lighting. In person, they are much more subdued, due to the large exposure latitude of the human eye. Also, the roughness of the skin texture is a product of the sharpness algorithm built into our digital camera; the actual glass piece looks very smooth. Top texture is "burlap" from PhotoShop. Original art by yours truly. I've got lace and patterned quilts that are up next. Kind of a whole new possibility for glass carving, isn't it? The next step is adding shade and shadow, using an airbrush. I should be well into that by the end of Spring 2003. Initial Success Vacuum Former |
|
©2005 Graydog Services • webmaster: jim(at)graydog(dot)org |